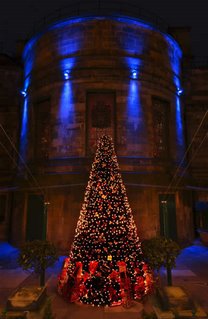
 Decorating the Christmas tree is the primary concern of most individuals. Putting up the lights, placing the lovely wreaths and garlands, hanging the ornaments and then just sitting down to take a happy and contended look at the marvelous finished product. 'Oh! What a beauty’. Well, I am also gearing up to start lighting my Christmas tree, so decided to share some tips with you all.
Sparkle and shine comes primarily from the tree lights. Faceted glass bulbs refract more light and appear brighter. Small twinkle lights and colored lights also have impact when you layer several strands and pair them with ornaments having reflective surfaces. To illuminate the tree from the inside out, string lights around the trunk and the branches. Starting at the base of the trunk and working up, wrap the lights around every major branch, moving from the trunk to the tip and back.
Mix and match lights- A background of white or clear lights can be highlighted with strands of colored lights that wrap the outside of the tree.
Lighting a Fresh tree.
Mentally divide the tree vertically into three triangular sections. Plug in the first string of lights and nestle the last bulb on the string at the top of the tree next to the trunk. Weave the lights back and forth across the triangle, being careful not to cross the cord over itself. When you reach the end of the first string, plug in the next set and continue weaving the lights back and forth until you reach the bottom, connecting no more than 300 lights end to end. Repeat this procedure for the remaining triangles.
Lighting an Artificial Tree
For subdued lighting, begin at the bottom of the tree close to the trunk. Allowing some slack or leader cord in the first strand of lights, separate the cord near the first bulb so it forms a loop. Slip the loop over one of the branch-lets or greens near the trunk, and wrap the cord a few times around the green to secure it. Pull the string of lights taut to the tip of the branch, and then work back toward the trunk, wrapping the cord over itself and the branch. Separate the cord again when you reach the trunk, and slip the cord over a branch let to secure it. Carry the cord over to the next branch, wrap it around a green near the trunk, and pull it out to the tip. Wrap the cord over itself and the branch as before. Continue wrapping branches in this manner to the end of the string. Plug in the next set, and keep going to the point where the tree comes apart. Work any extra lights back along the branch rather than crossing the section. When you wrap the top section of the tree, don't wrap the lights around as many branches, so the tree will look evenly lit from top to bottom.
Lights you can use
Consider using miniature clear (white) lights for your base lighting, then add strands of the new cool-burning large bulbs for color and variety. Or, add sets of novelty lights, such as flicker-flames, flashing lights, bubble lights, or other shapes.
LED Christmas lights
White Pine Cone Lights $12.95
Fancy Elk and Bear Lights $16.00
Plastic Trout Lights $16.00
Multi Colored Rice Lights $25.00
Green/purple Mini Lights $12.50
LED Bead Garland - $16.99
Icicle Light Set $26.99
100 Multicolor Fairy Lights 6M Christmas Decoration
100 Multicolor Fairy Lights 10M Christmas Decoration $1.95
Changing LED Glitter Ball 6 Light Set $16.99
For more check out:
http://www.christmasmoon.com/index.html
http://www.ehow.com/buy_1037_christmas-tree-lights.html
http://www.christmas-treasures.com/Lights.htm
No comments:
Post a Comment